After you’ve build your hackAIR sensor, you’ll need a case to protect it from the elements. You can use one of the options below, or come up with your own design. The sky is the limit!
When you pick a case, pay attention to the guidelines below to ensure proper functioning of the sensor.
Material
- Weatherproof & water resistant
- Check out sustainable and recyclable options
- No metal (could disturb WiFi or Bluetooth connectivity)
Size
- Electronic parts: length 10 cm, height 6 cm, width 5.5 cm
- All pieces need to fit inside the case
- The sensor should be placed a few centimeters below the electronic parts
Colour
- Should not get warm / overheated when exposed to sun
- Light colours (white, transparent) preferred
Ventilation
- Make sure that warmth is not trapped inside the case: ventilation is crucial
- Inlet and outlet need to have free air flow
Position
- Outside use only, ideally shaded
- Not directly next to sources that produce / disseminate particulate matter (such as chimneys)
- Height: best between 1.5 m and 4 m (same as official sensors)
Options for cases
- Plumbing pipe
- PET bottle
- Yoghurt bucket
- 3D printed case
Plumbing pipe

These are the pipes that the German air quality network luftdaten.info uses for their sensors.
See how it works: in this video tutorial.
PET bottle
This is an easy, quick and sustainable way to build your sensor case – upcycling a PET bottle!
Hester Volten, scientist air quality at the National Institute of Public Health and the Environment (RIVM) in the Netherlands and member of hackAIR advisory board, shows in this video how a PET bottle can be used as sensor case.
hackAIR consortium partner BUND created a tutorial for building your own sensor case from a PET bottle.
Yoghurt bucket
hackAIR team member Wiebke Herding (ON:SUBJECT) shows her current sensor setup (using three sensors: hackAIR home v2, luftdaten and RIVM). She writes:

“The RIVM sensor and the luftdaten sensor use the same casing: a yoghurt container (1000 g, available in supermarkets). I simply cut a large hole into the bottom (see inset). The lid makes it easy to insert the electronics. The bucket strap is perfect for hanging!
It’s waterproof with plenty of ventilation, mostly white and allows the sensor to be parallel to the ground (the intake slot is not supposed to face downwards).”

This video tutorial shows you how to build your sensor case from a yoghurt bucket (as shown on the right).
Let us know whether you can find these buckets in your country! We know they are available in Germany, the Netherlands, Belgium, Austria, Switzerland. Where else?
3D print
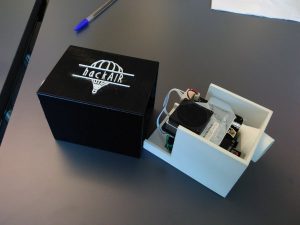
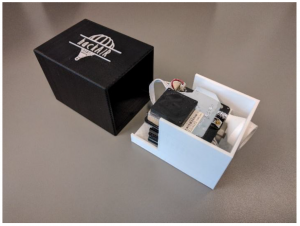
The Norwegian hackAIR consortium partner NILU (Norwegian Institute for Air Research) printed a 3D case for the sensor.
In the Maker Community, you will find many ideas and suggestions for 3D printing for cases and mounts. Have a look at Thingiverse!
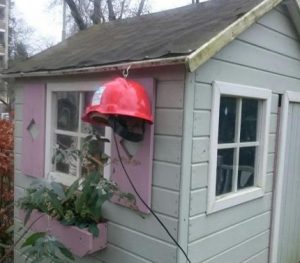
Send us pictures of YOUR sensor cases
We are very curious to see your creative ideas for sensor cases.
Here are resources for inspiration.
We will share your pictures with the hackAIR community!


 Eleftherios Spyromitros-Xioufis (CERTH)
 Gavin McCrory (VUB)
 Hai-Ying Liu (NILU)
 Panagiota Syropoulou (DRAXIS)
 Wiebke Herding (ON:SUBJECT)
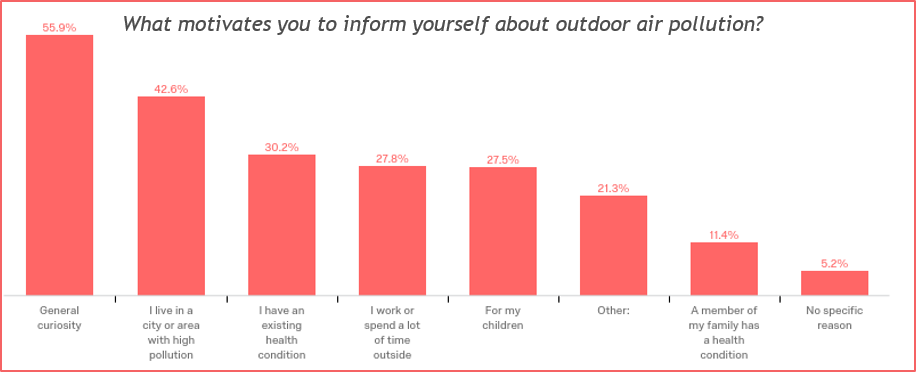
 We found that levels of awareness about the causes of air pollution are high amongst our sample, who regard traffic, emissions from industry and burning from household activities as the three main sources of particulate matter pollution. Awareness levels about the associated impacts of air pollution were similarly high – the main adverse effects identified include threats to health, effects on nature and lower quality of life. However, citizens indicated that they are less informed about which individual steps they can take to reduce air pollution.




 Ilias Stavrakas (TEI)
 Ioulia Anastasiadou (DRAXIS)
 Philipp Schneider (NILU)
 Inge Jansen (ON:SUBJECT)
 Arne Fellermann (BUND)
