Let’s compare readings from two sensors

By Wolfgang Röckelein

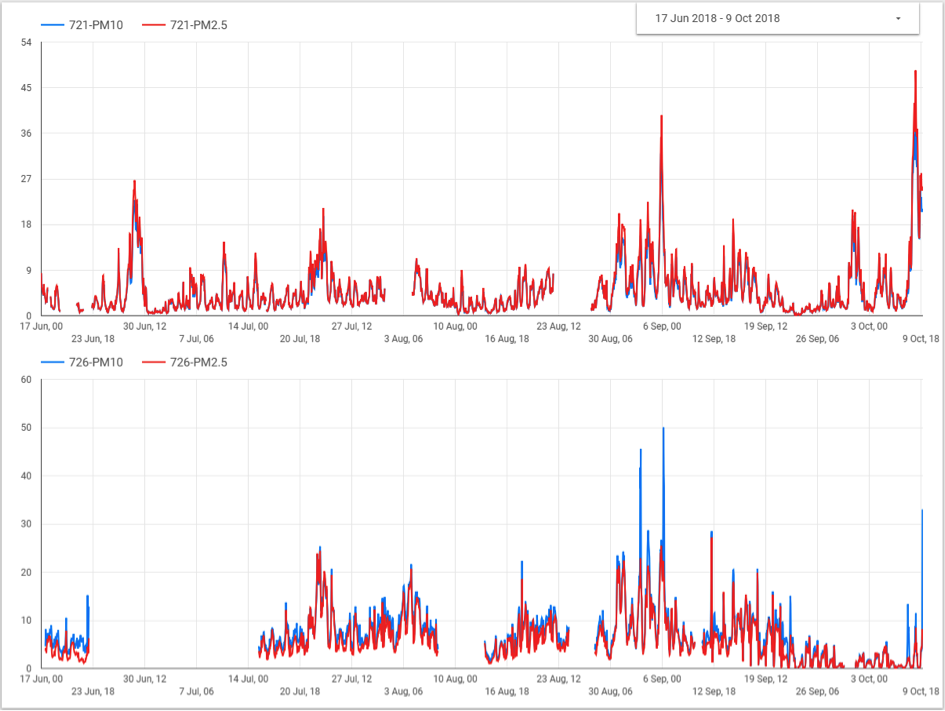
After I had assembled two hackAIR sensors together with my two sons and put them just outside their windows we started wondering in our family: how could we (or our neighbors) profit more from the sensor? What are the daily and weekly variations of the values of your sensor (or your sensor compared to other hackAIR home sensors)?

To learn about variations in our sensor measurements, this blog post prompted me to some more experiments with Google Data Studio and Google Sheets (yeah, I know, it’s Google, but first the sensor readings are no personal data, and second Google Data Studio and Google Sheets is available for free and have some nice and useful features for our purposes and is completely online, so no installs necessary). Instead of using data.world and (secret) sensor access keys, I built an open source Community Connector for Data Studio using the same API as in my hackAIR Kniwwelino project, thus the sensor identification is via sensor ID. As the API fetches no more than 5000 data points, therefore the connector fetches the data day-by-day. Each fetch takes around 10-15 seconds. The connector caches fetched values, but only for at most 6 hours due to Google Script limitations. See this post for a solution for this, but at first I will show how to compare PM2.5 and PM10 readings for two sensors from yesterday with Google Data Studio.

bp1

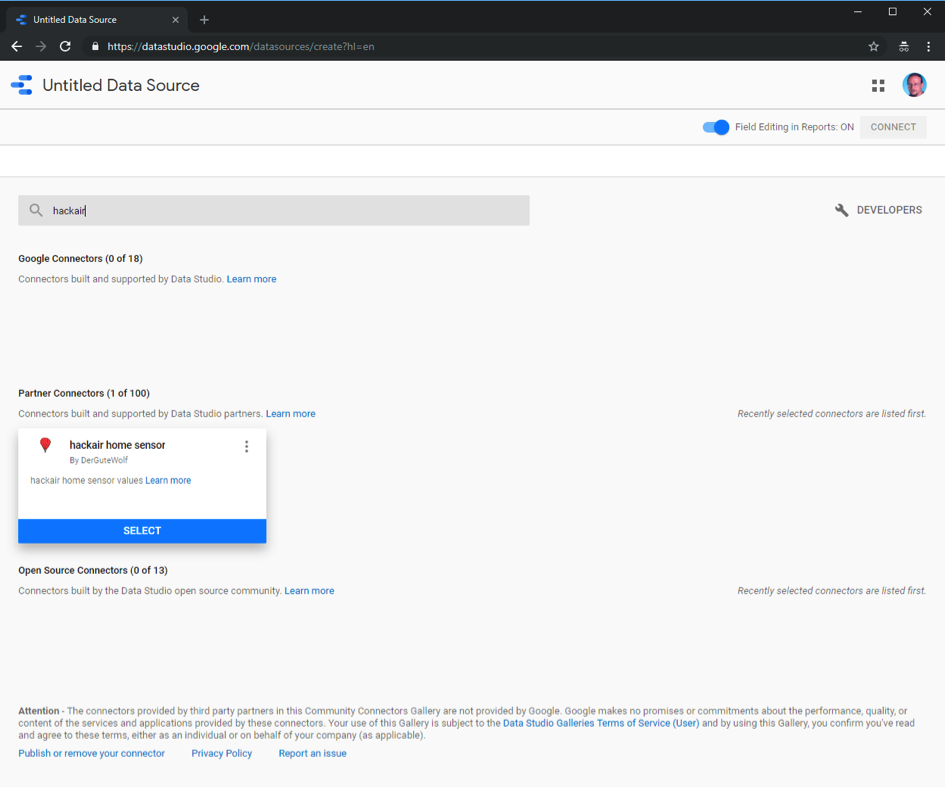
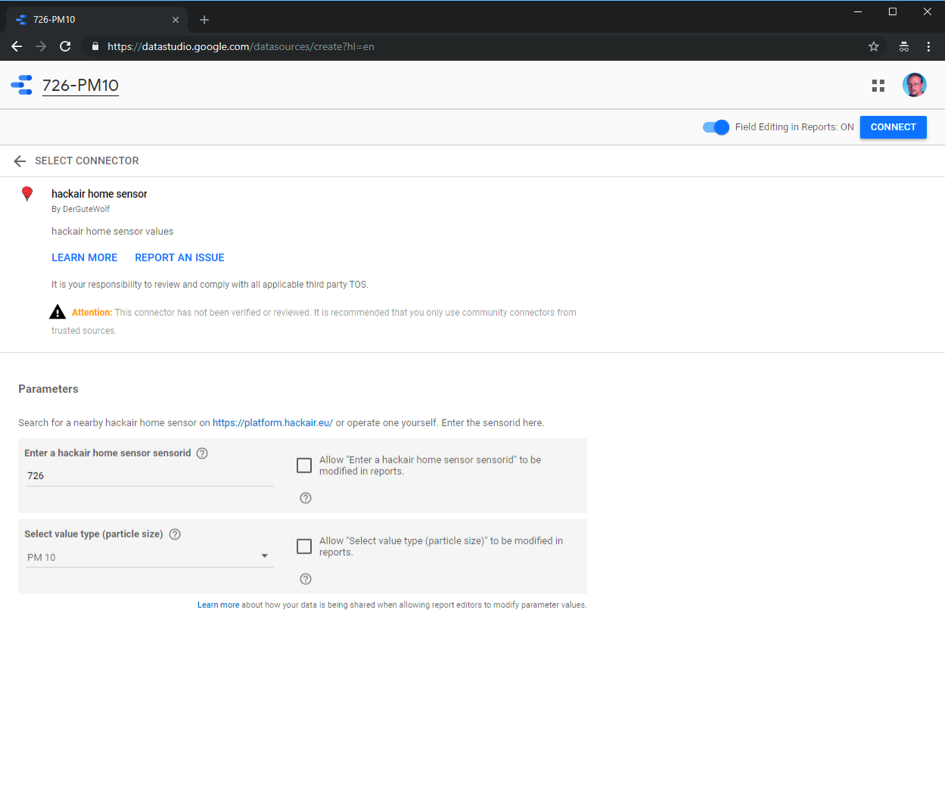
  •  Click on Select. Type in a sensor id, choose a particle size and name your data source at the top of the window accordingly:

bp2

·       Click on Connect:

bp3

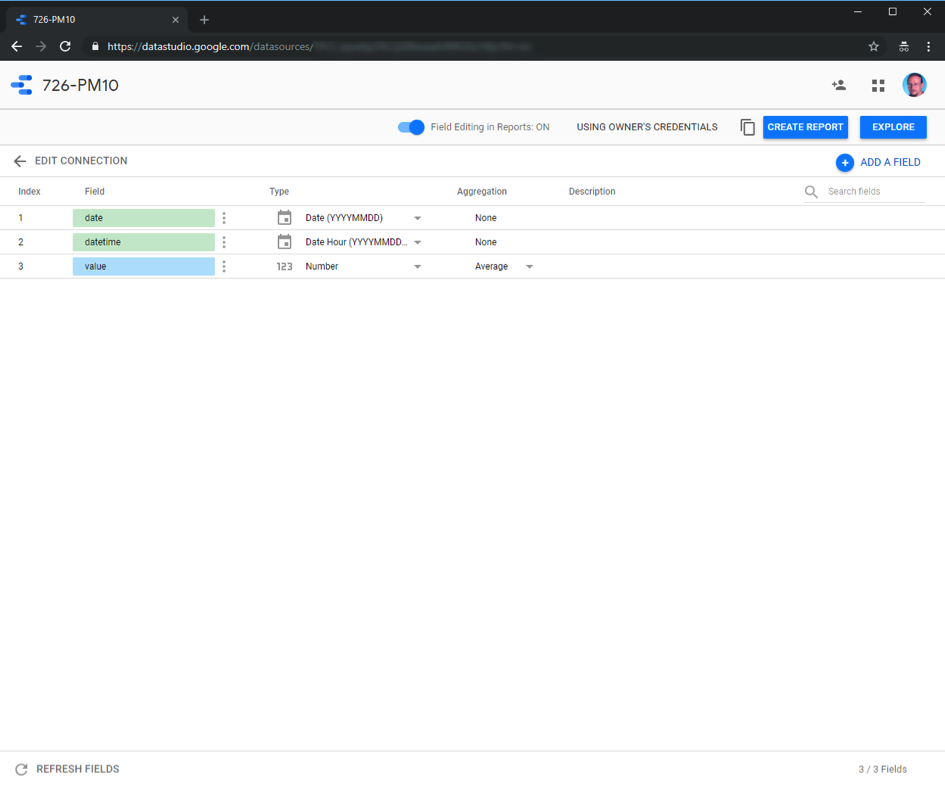
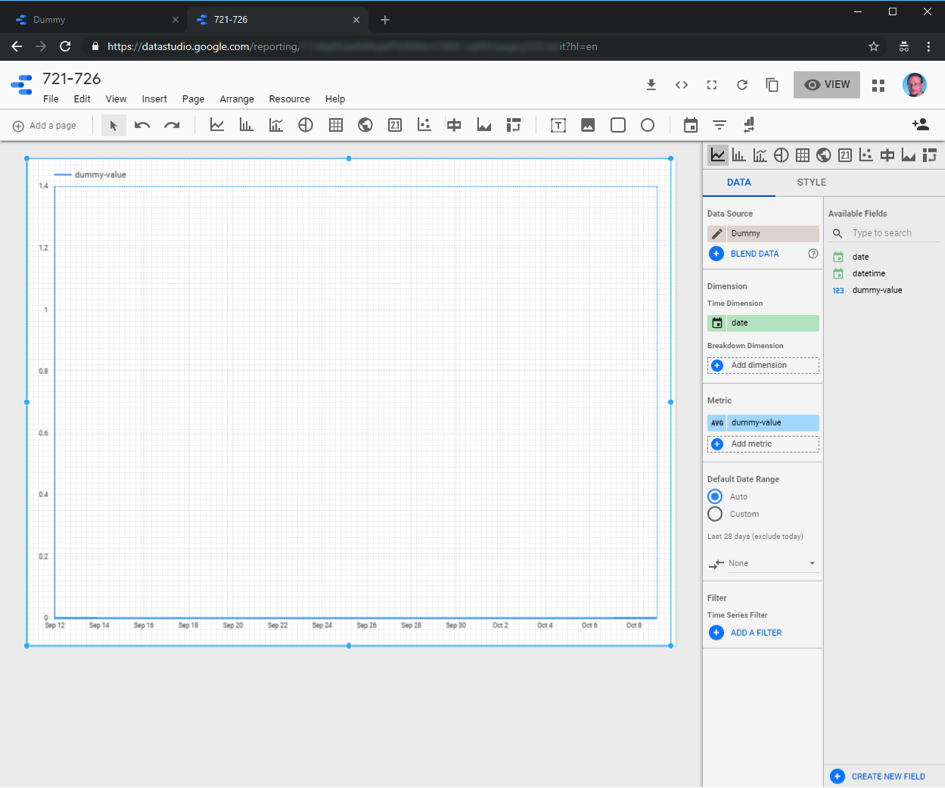
  • Click on the icon top left and do the same for the second particle size and likewise for the second sensor id and its two particle sizes. Do this again one more time for an arbitrary sensor id and particle size “Dummy” (the data connector only delivers data where data exists in order to provide a solid ground for further aggregation. However, data blend needs a lead with a complete timeline and the Dummy source provides such a lead). You should now have five data sources. At the final dummy data source creation click on create report instead of the data source icon. 
  • Give your report a name (you can adjust layout and theme also), choose Time series and draw a rectangle covering the report area:

bp4

  • Add a data range control and choose yesterday as the default data range:

bp5

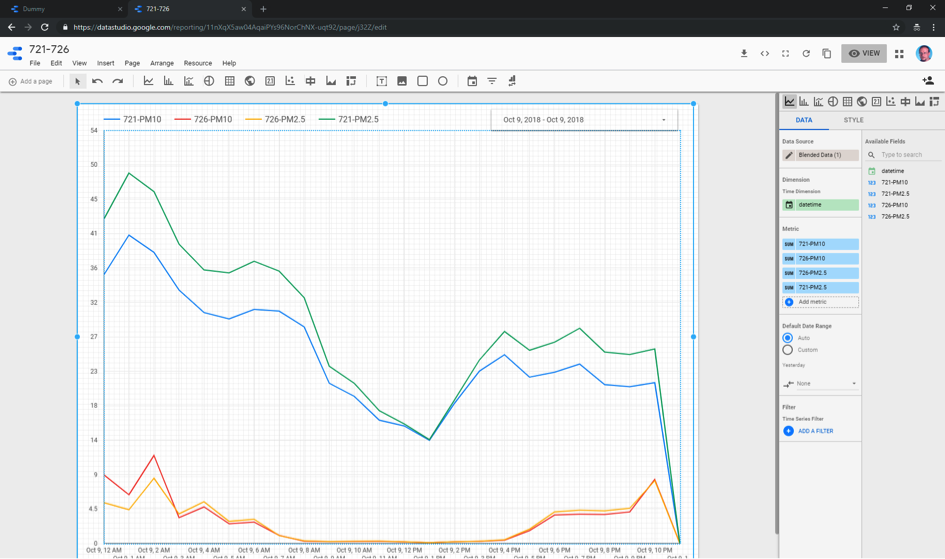
  • Click on Apply and click on the time series chart. Click on Blend Data for data fusion of the four data sources. Replace date by datetime on the Dummy data source. Remove the dummy-value field. Add all remaining four data sources and name the value fields appropriately. Make sure that Date Range is for all five sources set to Auto (i.e. use our date range control).

bp6

  • You could give your data blend also a name. Click Save and Close. Add the four then available metric fields to the report.

bp7

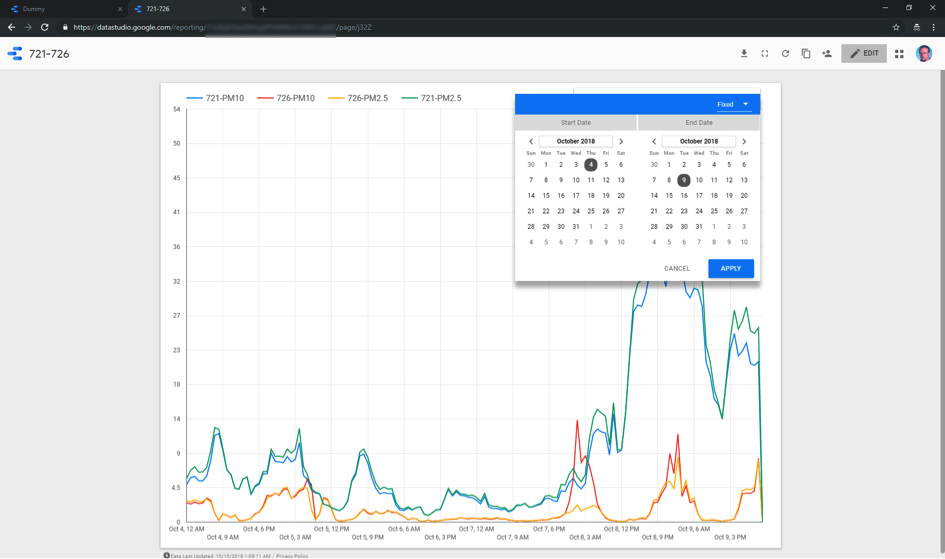
  • You have now a report comparing two hackAIR home sensors and two value types. Choose View and select some more days at the date range control (not too much in order not to get timeouts…) and click on apply

bp8

  • Choose the Share this report icon and click on the upper right text to get a link to provide to other people or to use in a web page to display this report. Click on Edit and choose File/Embed and selecting Enable Embedding in order to get a HTML snippet or a URL to include in a web page. You can also use the URL to construct a HTML code which can be used to embed a thumbnail with a link to the full report page inside an HTML page.

Sample html code

hackAIR 721-726

To visualize larger timescales, check out Larger date ranges need a better cache 

For more data visualizations built on top of the hackAIR air quality data, see our overview post

Larger date ranges need a better cache

By Wolfgang Röckelein

This post builds on Let’s compare readings from two sensors.

Ok, well done. BUT: this only works for small date ranges, for bigger date ranges you will get timeouts. Therefore, we need a better cache for the API request results. We will use Google Sheets for storing the complete readings of hackAIR home sensors. Google Sheets can also be a Google Data Studio data source. Google Sheets is scriptable and we will use the already well known hackAIR API in a Google Sheets script to regularly update a Google Sheet with the newest sensor readings.

  • Start Google Sheets at https://docs.google.com/spreadsheets/ Create a new Spreadsheet and give it a nice name at the top. Use the desired sensor ID as the Sheet name at the bottom. A spreadsheet has a limit of two million cells; each reading takes three cells (datetime, PM2.5, PM10). So better use a separate spreadsheet for each sensor in order not to hit this limit, if you stay inside the limit you could use one spreadsheet with e.g. two sheets one for each sensors.
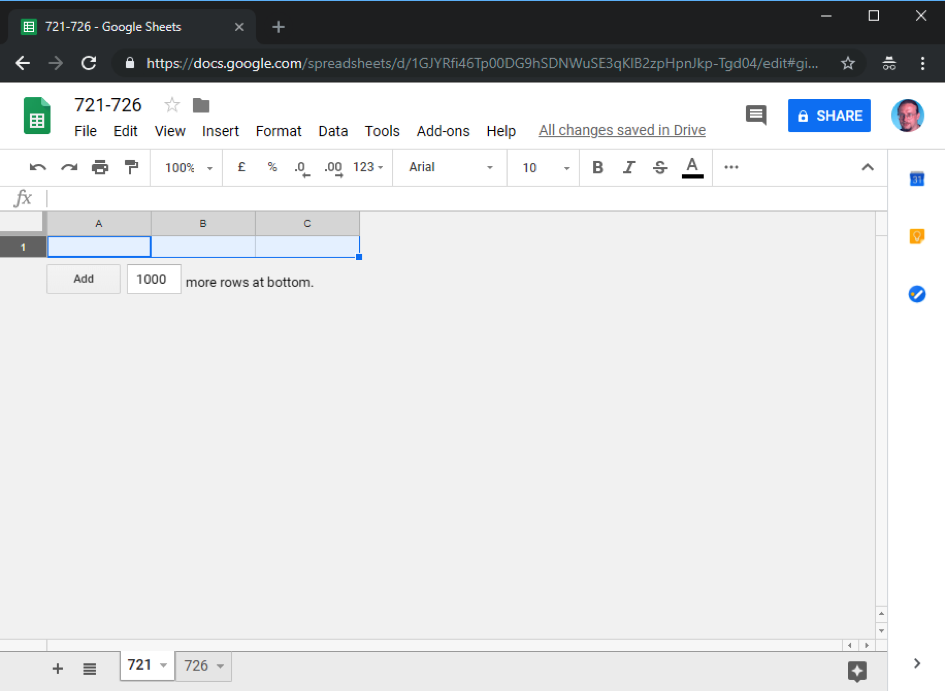
  • Delete all columns except A, B and C in all sheets. Delete all rows except the first row in all sheets. Result should look like this:

bp9

  • The URL should look like this, record your xyz value.

https://docs.google.com/spreadsheets/d/xyz/edit#gid=0

 
  • We will now use this script to do the initial fill and regular update of your Google Sheets. In your sheet, choose the menu item Tools/Script editor. Give your script a name in the upper left corner (e.g. hackAir) and replace the initial code with the empty myFunction with the code from the link above (click on the Raw button, the use control-a and control-c to copy the code, switch to the script editor and use control-a and control-v to paste the code). Replace xyz in the fourth line with the recorded value from above and replace the date in the third line with your desired start date. 

https://github.com/DerGuteWolf/hackair-googlesheets-script/blob/master/Code.gs

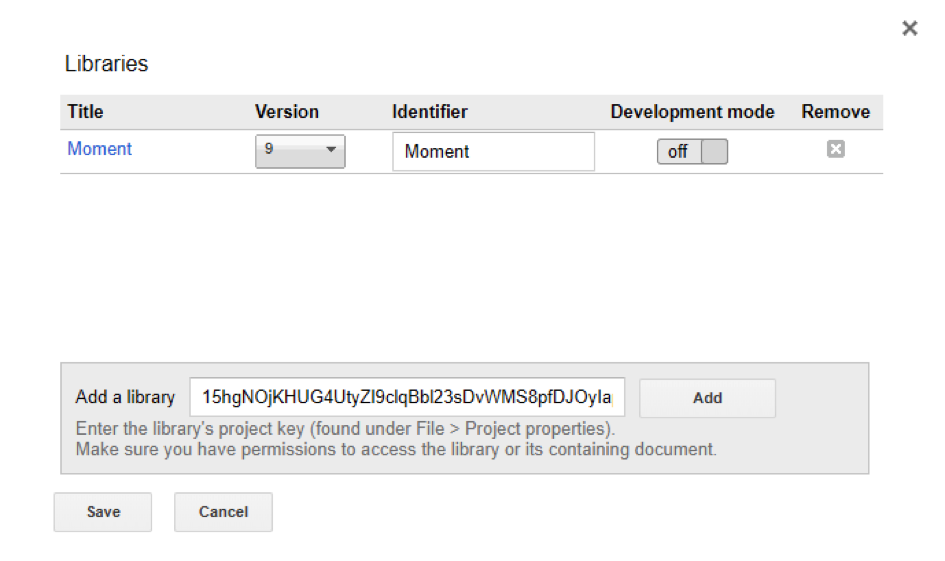
  • Choose Menu > Resources/Libraries and add the Moment library by entering 15hgNOjKHUG4UtyZl9clqBbl23sDvWMS8pfDJOyIapZk5RBqwL3i-rlCo and clicking Add. Choose the most current version.

bp10

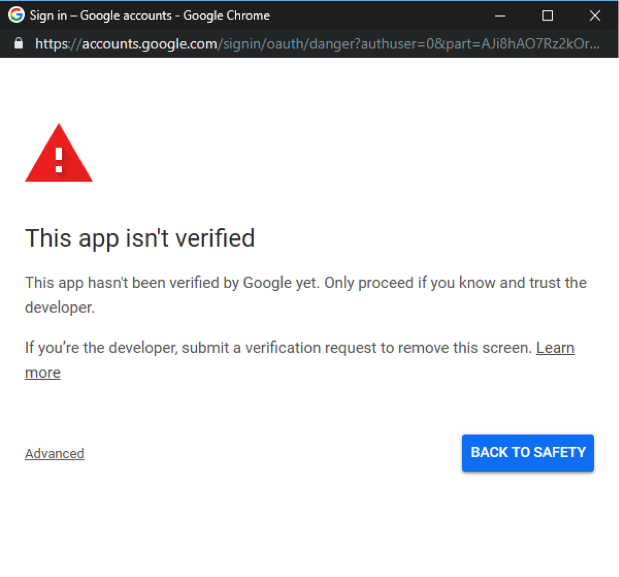
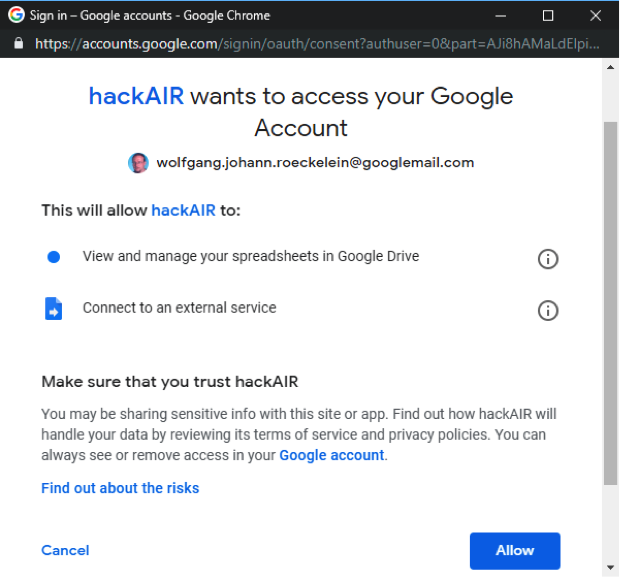
  • Click Save to save the script. Execute the script with the run button. Grant the script the permission to access your Google sheet, choose “Advanced” and “Go to hackAIR (unsafe)” and then “Allow”. 

bp11

bp12

  • Be prepared that this will take some time (as I already wrote one call per day and sensor and a single call takes a while)! You might need to run the script more than once because of timeout problems. At the end all of your sheets should contains datetime values and sensor readings from the date entered up to the current day. 
  • To schedule the script to run regularly choose menu entry Edit/Current Script’s Triggers. Click the link to add a trigger:

bp13

  • Click Save. With this setting the sheet will auto-update itself each night.
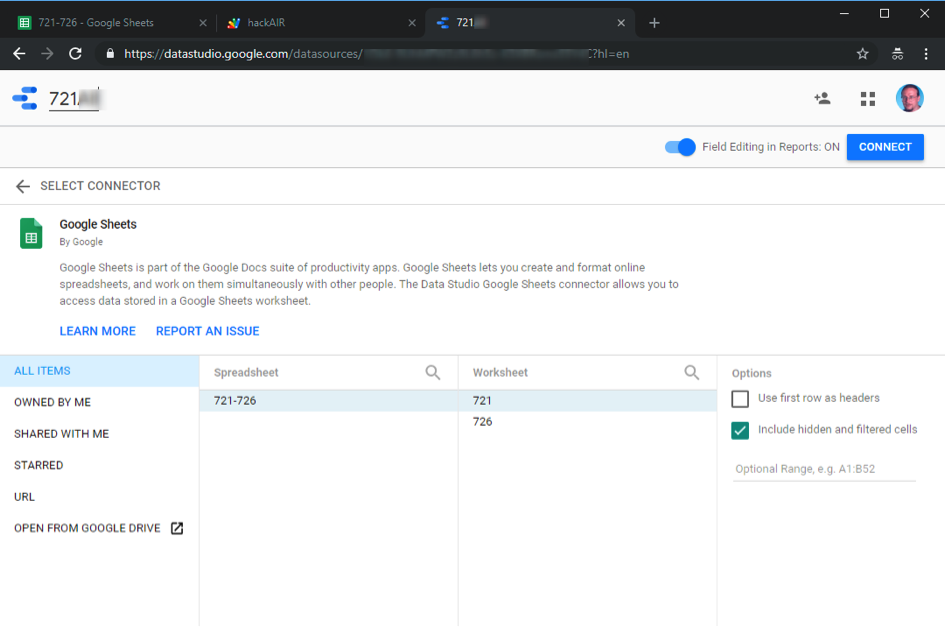
  • Go back to your data sources of Google Data Studio (https://datastudio.google.com/navigation/datasources?hl=en). Click on the plus button in the lower right and select the Google Sheets connector. Choose your Spreadsheet and the first sheet. Deselect “Use first row as header” and name your data source in the upper left.

bp14

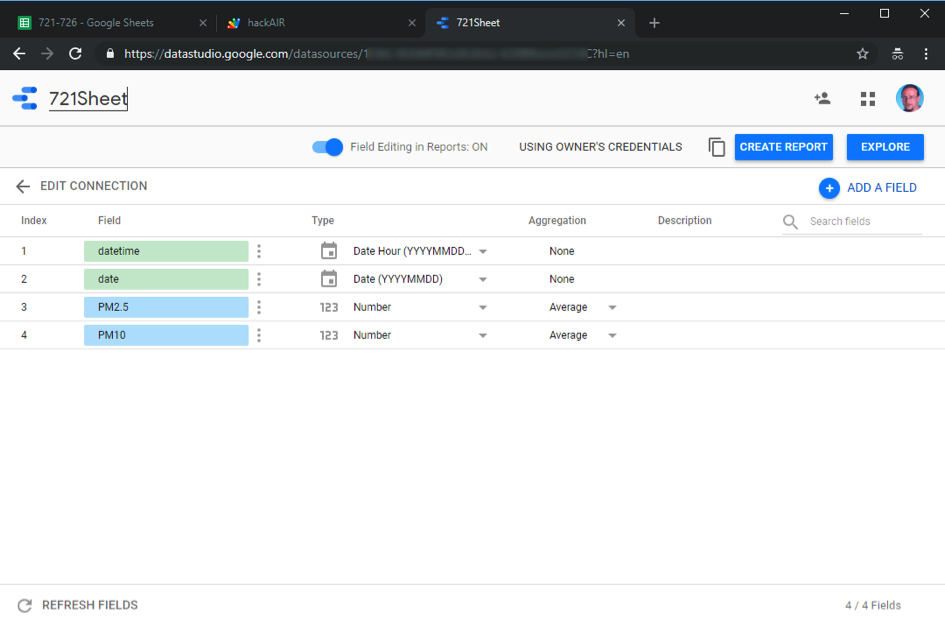
  • Click Connect. Duplicate the first field (with the three dots menu next to the name). Name the first field datetime and choose Date Hour as type. Name the second field date and choose Date as type. Name the third field PM2.5 prefixed by the sensorid and choose Average as the Aggregation. Name the forth field PM10 prefixed by the sensorid and choose Average as the Aggregation.

bp15

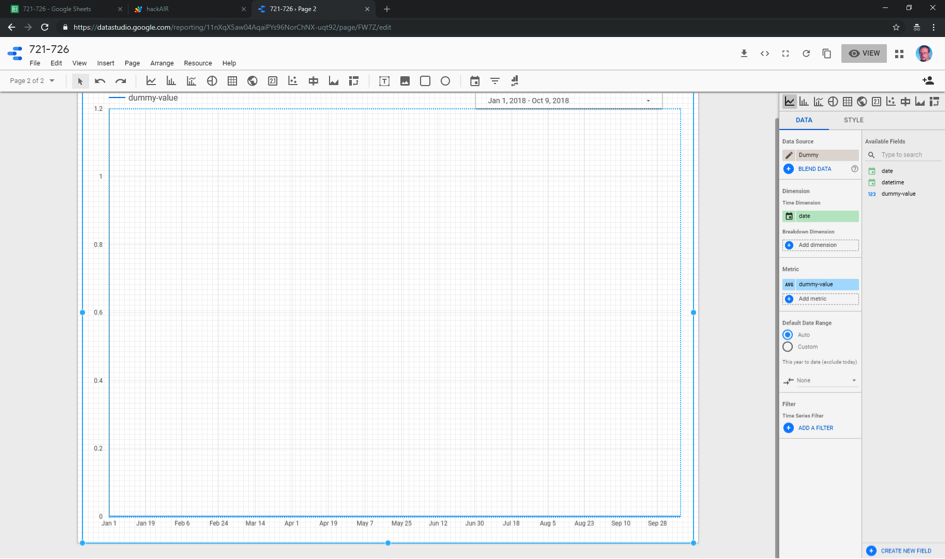
  • Click on the Icon in the upper left and do the same for the other sensor. Click on the Icon in the upper left, click on reports on the left, and select the report created above. Click Edit and choose Page/New page. Click on the Time series Icon and create a big chart. Remove the default data source and add first our Dummy data source from above. Add a date range control and choose e.g. “This year to date” as the default value. Click on the chart and then on Blend Data.

bp16

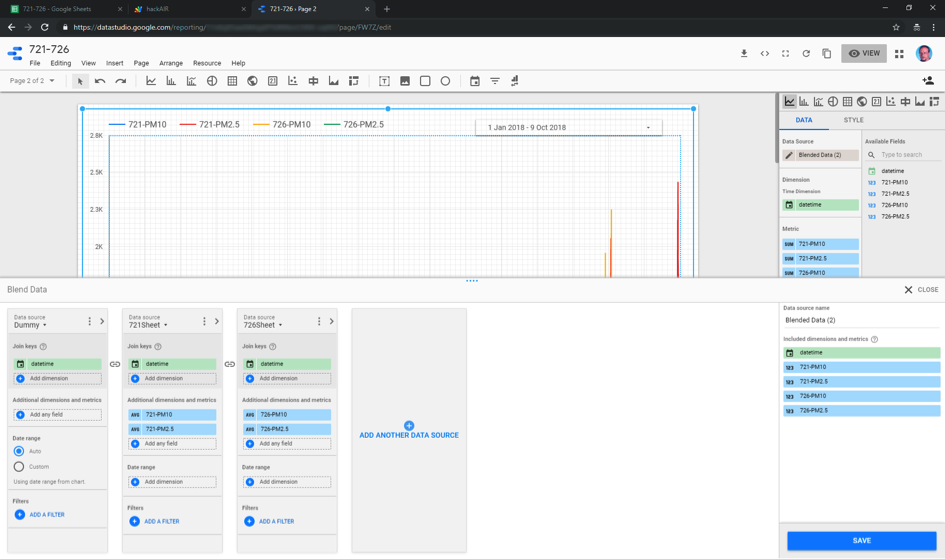
  • Use only datetime field from the Dummy data source, select Auto for Date range and add our new sheets data sources. Add the PM fields of each data source:

bp17

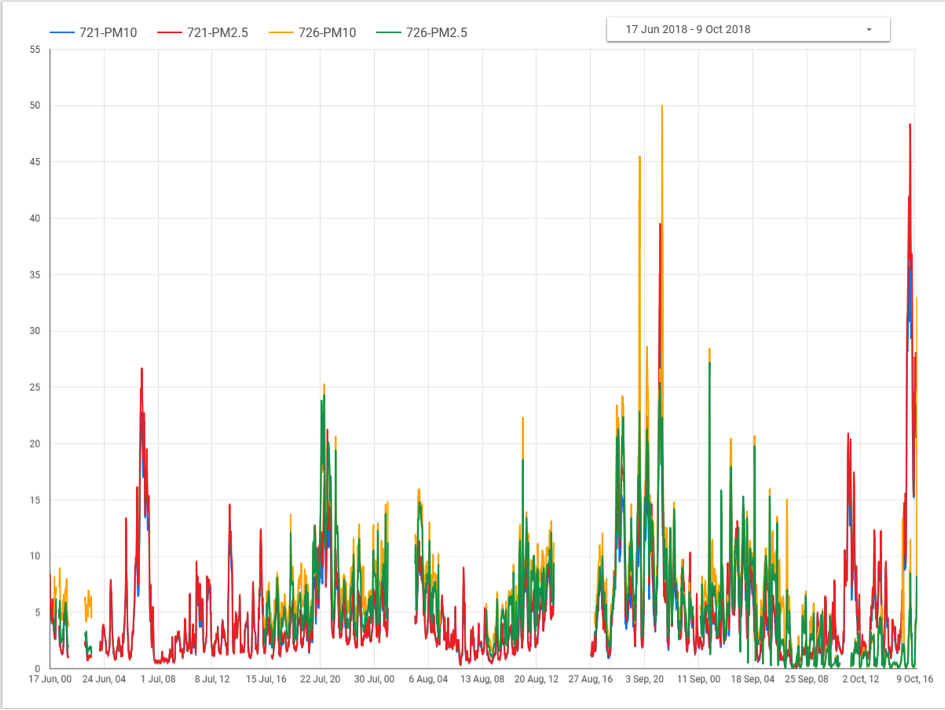
  • You could again give your data blend a name. Click Save and click Close. Click View to experiment with the date range.
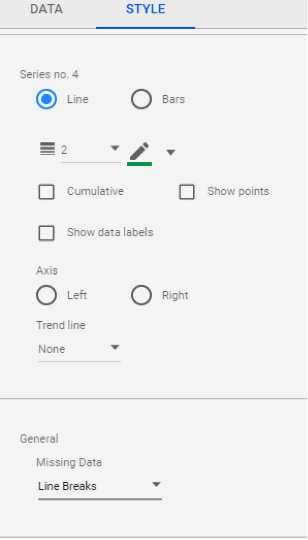
  • Unfortunately, for both pages when the first added data source has no values, the values from the second added data source shows no values. To see this better, click on the chart and select theme on the right and set General-Missing Data to Line Breaks.

bp18

bp19

  • You could also try two charts below each other. A data range control works for the whole page so put only one on the page.

bp20

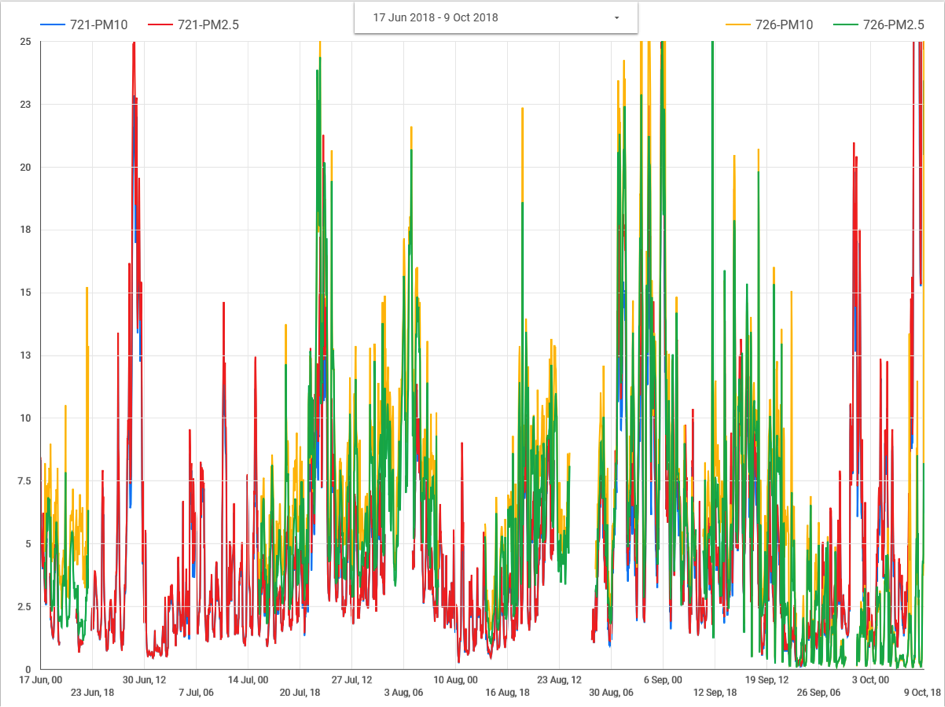
  • Alternatively, you could overlay both charts, but you would then need to give both charts an identical fixed max value for the y-axis (also available in the theme settings).

bp21

For more data visualizations built on top of the hackAIR air quality data, see our overview post.

A simple display using Kniwwelino

By Wolfgang Röckelein

After I had assembled two hackAIR sensors together with my two sons and put them just outside their windows we started wondering in our family: how could we (or our neighbors) profit more from the sensor? What are the daily and weekly variations of the values of your sensor (or your sensor compared to other hackAIR home sensors)?

We had been experimenting with some Kniwwelinos, and started using them as an addition to the hackAIR home sensor. A “Kniwwelino” is a small and cheap computer device for use in education. They come from Luxemburg, and have some nice features making them an ideal companion to the hackAIR home sensor: They have Wifi connectivity, a 5×5 LED matrix, a RGB LED and two buttons, are USB-powered and are cheap (around 12€). Plus they use the same CPU and development environment as the hackAIR home sensors!

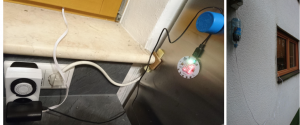
I developed a script for the Kniwwelino to regularly obtain the most current readings of one hackAIR home sensor from the hackAIR platform (no need to change anything on your hackAIR home sensor and your neighbors could use the same approach to see the measurements). The index value (very good, good, medium and bad) sets the RGB LED color to green, yellow, orange and red respectively and when you press a button you see either the PM2.5 or the PM10 reading from your sensor as scrolling text on the LED matrix. The script is public source, so feel free to get one (or two or three…) Kniwwelinos to get an up-to-date display on your hackAIR home sensor readings. You need an USB power supply and should use a mechanical clock timer so the Kniwwelino is only operating when you are awake and at home in order to conserve energy. You can programme the sensor ID the Kniwwelino should use and the ID is stored in flash memory, so it is used when the clock timer repowers the device.

For more data visualizations built on top of the hackAIR air quality data, see our overview post.

Make even more sense of your hackAIR home sensor data

In March, we published a first story on visualizing hackAIR data. hackAIR users have started taking data visualization into their own hands – here’s an overview of exciting experiments we’ve found so far.

A simple display using Kniwwelino. How to combine a small electronic device used in education with data from your hackAIR home sensors to build a simple LED display for your family and neighbours.

Let’s compare readings from two sensors. How to use Google Data Studio to compare PM2.5 and PM10 readings for two sensors from yesterday.

Larger date ranges need a better cache. How to use Google Sheets to overcome API limitations and store data to visualize larger time scales.

Happy experimenting with Kniwwelinos, Google Data Studio, Google Sheets and other tools for your (and our) hackAIR home sensor readings!

Copyright 2021. All rights reserved

Take part in this short survey and help us improve your hackAIR experience.